Why Your Water Heater Pressure Relief Valve Deserves Immediate Attention
A replacement pressure relief valve water heater repair is one of the most important safety fixes a homeowner can make, and it is also one of the most overlooked. If your valve is dripping, leaking, or failing its annual test, your water heater may be operating without its primary safety protection.
Here is a quick overview of what you need to know:
- What it is: The temperature and pressure (T&P) relief valve is a safety device that automatically releases water if your tank reaches dangerous heat or pressure levels.
- When to replace it: Replace the valve if it is dripping, corroded, fails to open during testing, or is more than 5 years old.
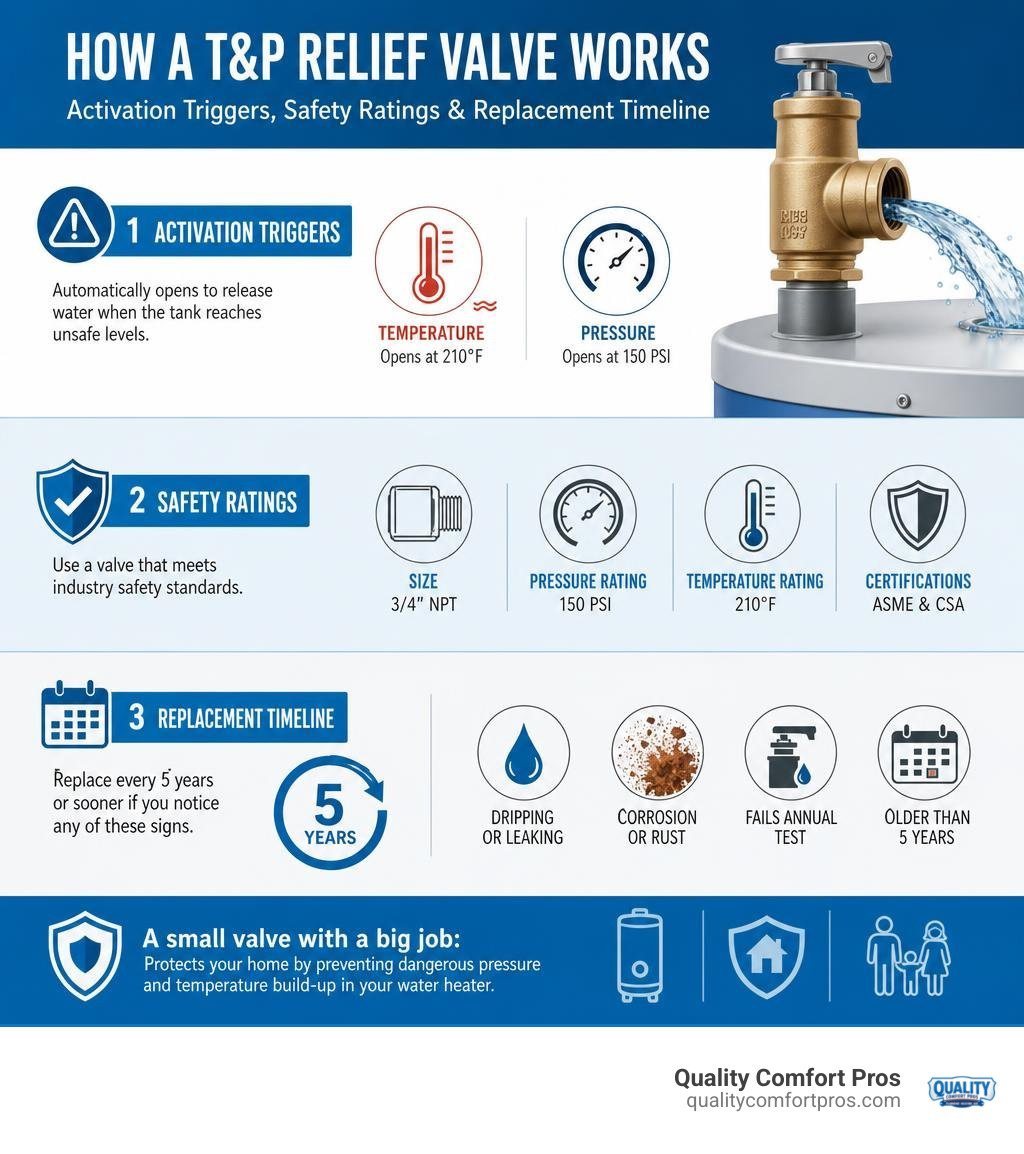
- What to buy: Look for a 3/4-inch NPT valve rated at 150 PSI and 210 degrees Fahrenheit with ASME and CSA certifications.
- How to replace it: Turn off power and water, drain the tank below the valve, remove the old valve, apply Teflon tape, and install the new valve.
- Cost: DIY replacement is generally affordable, while professional installation varies depending on your location and system complexity.
- When to call a pro: If the new valve still leaks, or if high water pressure or thermal expansion is the underlying cause, contact a licensed plumber.
Most homeowners in Northern Michigan do not think about their water heater’s T&P valve until something goes wrong. But this small, inexpensive component is the only thing standing between a normally operating water heater and a serious pressure-related failure. Standard residential T&P valves are rated at 150 PSI and 210 degrees Fahrenheit, and most manufacturers recommend replacing them every 5 years as preventative maintenance, even if no visible problems have appeared yet.
The good news is that replacing a T&P valve is one of the more beginner-friendly plumbing repairs you can tackle yourself. With the right valve, a few basic tools, and a clear step-by-step process, most homeowners can complete the job in under an hour.
I’m JD Osman, and with over 20 years of experience in home services and a deep focus on helping Northern Michigan homeowners navigate everything from HVAC repairs to replacement pressure relief valve water heater situations, I have guided countless homeowners through exactly this type of repair. In the sections below, I will walk you through everything you need to know to do this job safely and correctly.
Related content about replacement pressure relief valve water heater:
Understanding the T&P Valve and Why It Fails
To appreciate why a replacement pressure relief valve water heater is so critical, it helps to understand what this small metal valve actually does. Your water heater is essentially a sealed pressure vessel. As water heats up, it expands. Under normal conditions, this expansion is managed by your plumbing system or a dedicated thermal expansion tank. However, if your water heater thermostat fails and the burner or heating elements run continuously, the water inside can quickly reach boiling temperatures, creating extreme steam pressure.
This is where the temperature and pressure relief valve steps in. It is designed to act as an emergency escape route. If the internal tank pressure reaches 150 PSI or the water temperature climbs to 210 degrees Fahrenheit, the valve automatically pops open to discharge superheated water and steam, relieving the pressure before it can cause a catastrophic tank rupture.
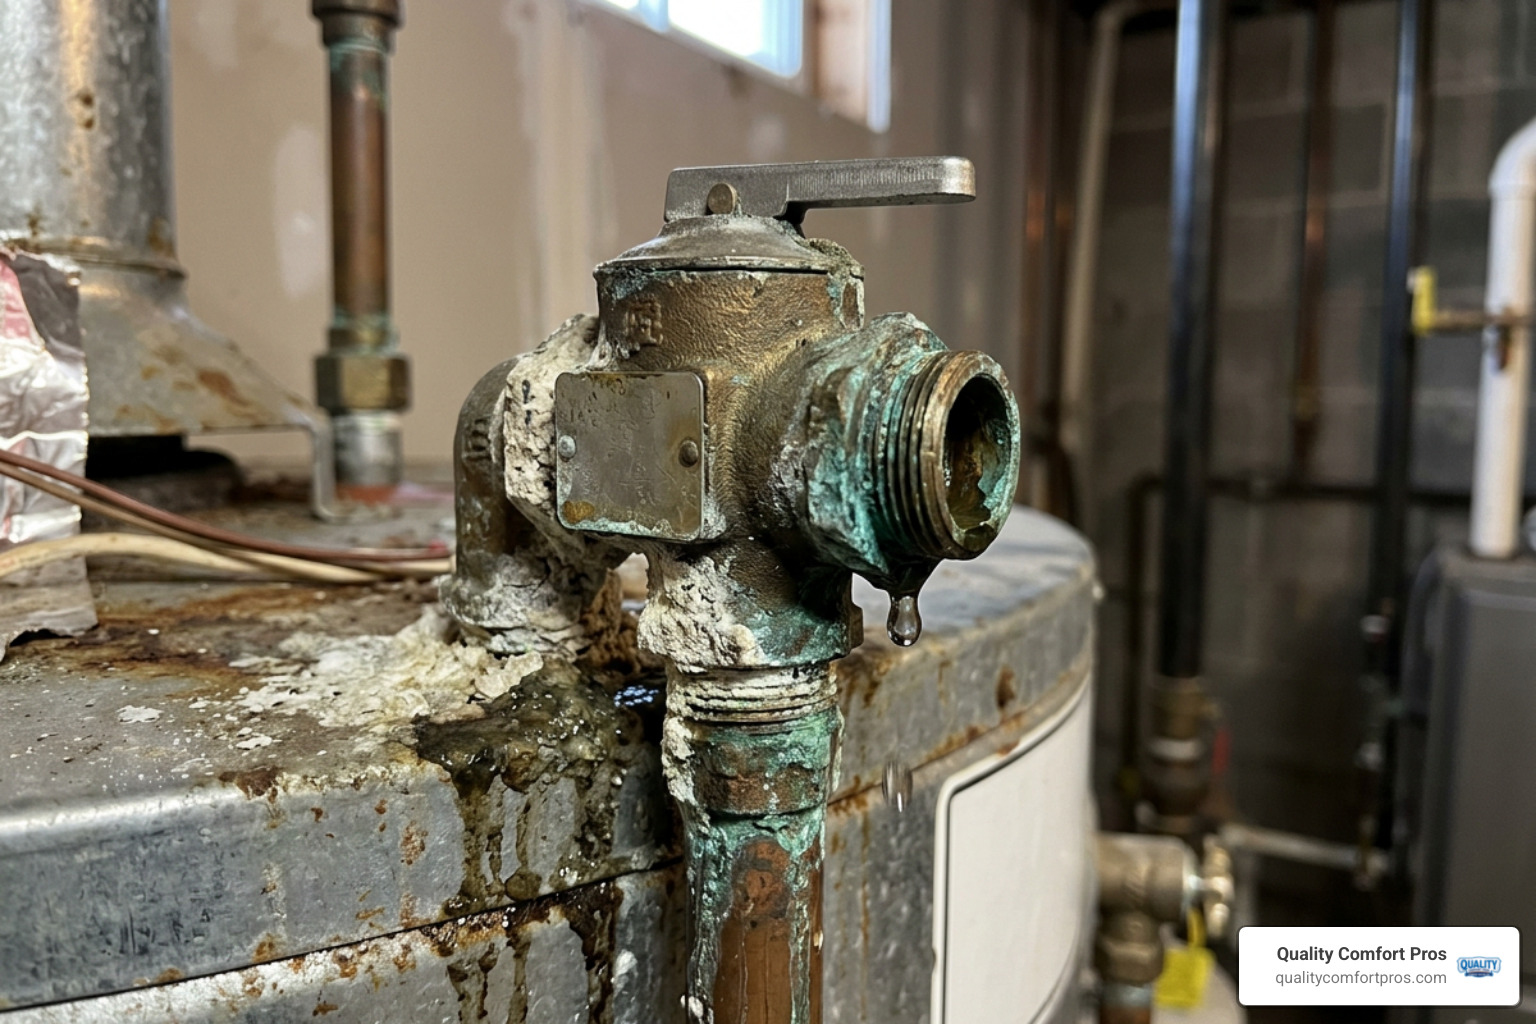
Over time, this hard-working safety valve can fail due to several common issues:
- Mineral and Scale Buildup: Calcium and magnesium in Northern Michigan water can settle inside the valve body, preventing the internal spring-loaded seal from closing fully or opening when needed.
- Corrosion: Constant exposure to hot water eventually degrades the internal brass and copper components, leading to slow, persistent leaks.
- Weakened Springs: The mechanical spring inside the valve can lose its tension over years of heat cycles, causing the valve to open at much lower pressures than its rating.
When a T&P valve fails, it either gets stuck open, leading to a constant, wasteful drip, or it gets stuck closed, which is a major safety hazard. A completely seized valve cannot relieve pressure, leaving your home vulnerable to a dangerous tank explosion if the system ever overheats.
Signs You Need a Replacement Pressure Relief Valve Water Heater
Knowing when to replace your T&P valve can prevent minor drips from turning into major household floods. We recommend checking your water heater monthly for these common warning signs:
- Constant Dripping or Leaking: If you notice a steady pool of water under the discharge pipe, or if the pipe is constantly warm to the touch, the internal seal has likely failed.
- Visible Rust or Corrosion: Heavy mineral crusting, green oxidation, or rust around the valve threads or the test lever indicates that water is slowly escaping and eating away at the metal.
- A Failed Manual Test: When you lift the metal test lever on top of the valve, water should flow freely out of the discharge pipe. When you release the lever, the water should snap shut immediately. If no water comes out, or if the valve continues to drip after you close it, the valve is faulty.
- Age: If your water heater is more than 5 years old and has never had its T&P valve serviced, it is time for a proactive replacement.
If you spot any of these signs, acting quickly is your best course of action. If you are uncomfortable handling this repair yourself, scheduling a professional water heater repair is the safest way to restore your system.
How to Choose the Right Replacement Pressure Relief Valve Water Heater
Choosing a replacement pressure relief valve water heater is not a one-size-fits-all process. Installing a valve with the wrong specifications can prevent your water heater from operating safely or lead to immediate leaks.
To select the correct valve, look at the metal identification tag attached to your existing T&P valve. This tag contains vital information about the pressure rating, temperature limits, and BTU capacity. If the tag is missing or illegible, you can find these specifications in your water heater owner’s manual or on the manufacturer’s website.
| Specification | Standard Residential Value | Purpose |
|---|---|---|
| Inlet Thread Size | 3/4-inch NPT (National Pipe Thread) | Matches the standard tank connection port |
| Pressure Rating | 150 PSI (Pounds per Square Inch) | The maximum safe operating pressure for the tank |
| Temperature Rating | 210°F (99°C) | The threshold where the valve opens to prevent boiling |
| BTU Rating | Must exceed water heater BTU input | Ensures the valve can discharge steam fast enough |
| Shank Length | Standard (approx. 1 inch) or Extended (2 to 2.5 inches) | Accommodates different insulation thicknesses |
Key Specifications for a Replacement Pressure Relief Valve Water Heater
When shopping for your new valve, pay close attention to these four technical details:
- Thread Size: The vast majority of residential water heaters use a 3/4-inch male NPT inlet and a 3/4-inch female NPT outlet. Ensure you do not accidentally purchase a 1/2-inch or 1-inch commercial valve.
- Pressure and Temperature Ratings: Standard residential water heaters require a valve rated at exactly 150 PSI and 210 degrees Fahrenheit. Never use a valve with a lower rating, as it will open during normal operation.
- BTU Capacity: The valve’s BTU steam-discharge rating must be equal to or greater than your water heater’s input rating. For example, if your gas water heater is rated at 40,000 BTUs, your replacement valve must be rated for at least 40,000 BTUs to ensure it can vent steam quickly enough in an emergency.
- Shank Length: If your water heater has thick foam insulation, you will need an extended shank valve, which features a longer brass neck to reach the actual tank threads through the outer casing. For more information on water heater safety standards, you can consult the U.S. Department of Energy guidelines.
Step-by-Step DIY T&P Valve Replacement Guide
Replacing a T&P valve is a highly manageable DIY project that requires only a few basic plumbing tools. By taking your time and following the proper safety steps, you can complete this project safely.
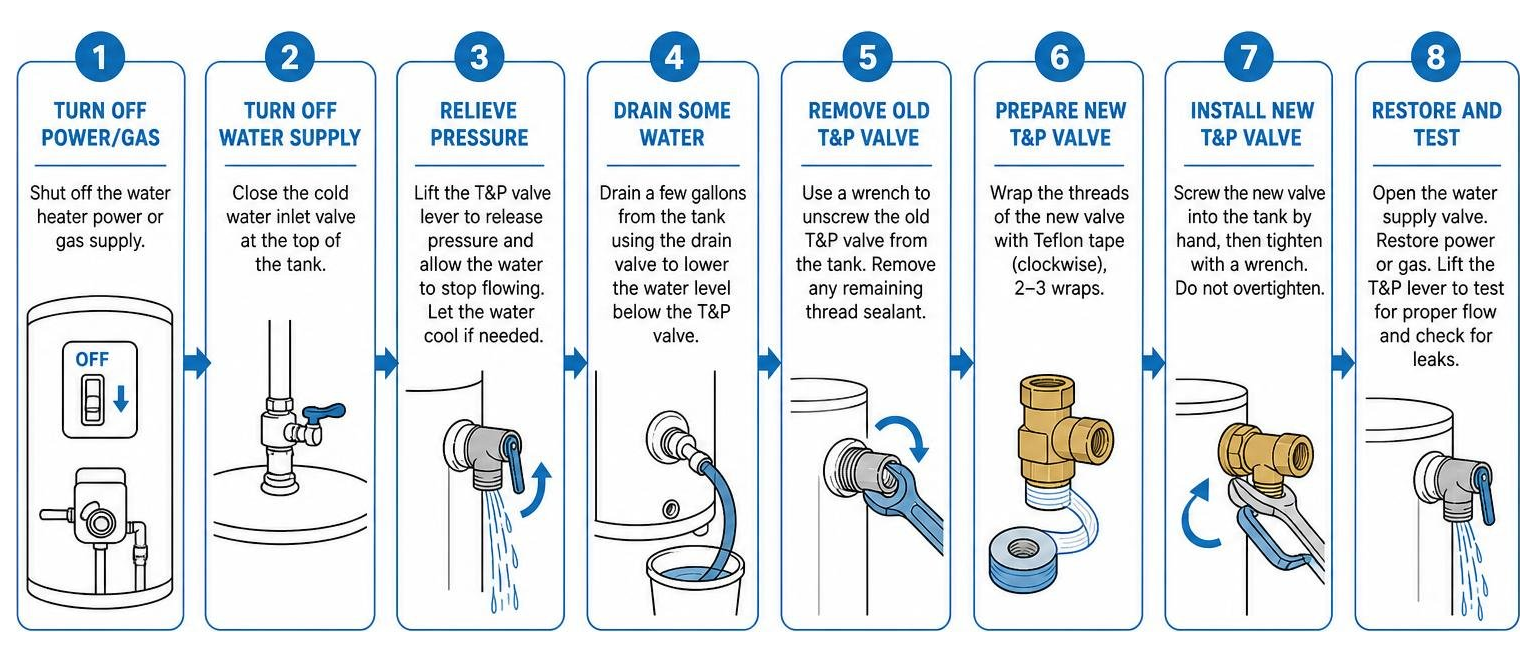
Before you begin, gather the following tools and materials:
- A new certified T&P relief valve
- Teflon tape (pipe thread sealant tape)
- An adjustable wrench or pipe wrench
- A standard garden hose or a clean bucket
- A screwdriver (if your discharge pipe is secured with a screw)
Preparing Your Water Heater for Valve Replacement
Safety is the absolute priority when working on any appliance that handles high-voltage electricity, gas, and scalding water. Follow these steps to prepare your system:
- Shut Off the Energy Source: For electric water heaters, switch off the dedicated circuit breaker in your main service panel. For gas water heaters, turn the control dial on the gas valve to the “OFF” position.
- Shut Off the Water Supply: Locate the cold water shut-off valve on the pipe leading into the top of your water heater and turn it clockwise until it is fully closed.
- Relieve Tank Pressure: Open a hot water faucet somewhere in your home to let air into the system and prevent a vacuum from forming.
- Drain the Tank Partially: Attach a garden hose to the drain valve at the bottom of the water heater and run the other end to a floor drain or outside. Alternatively, place a bucket under the drain valve. Open the drain valve and let out about 2 to 3 gallons of water. You only need to lower the water level below the height of the T&P valve so water does not spill out when you unscrew it.
Taking these precautions protects your home from water damage and ensures a smooth repair process. Regular maintenance like this is a core part of keeping your system running efficiently, as outlined in our guide on water heater maintenance.
Removing and Installing the New Valve
With the water level lowered and the power safely disconnected, you can now proceed with the physical replacement:
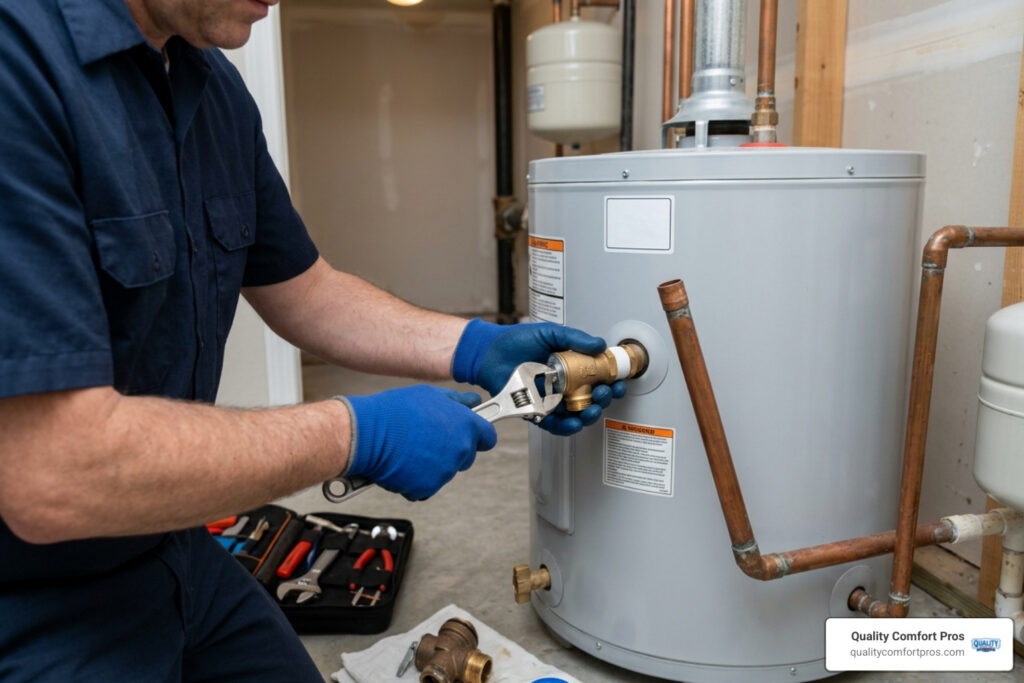
- Disconnect the Discharge Pipe: Use your wrench to unscrew the discharge pipe from the outlet of the old T&P valve. Set the pipe aside, taking care not to bend or damage it if you plan to reuse it.
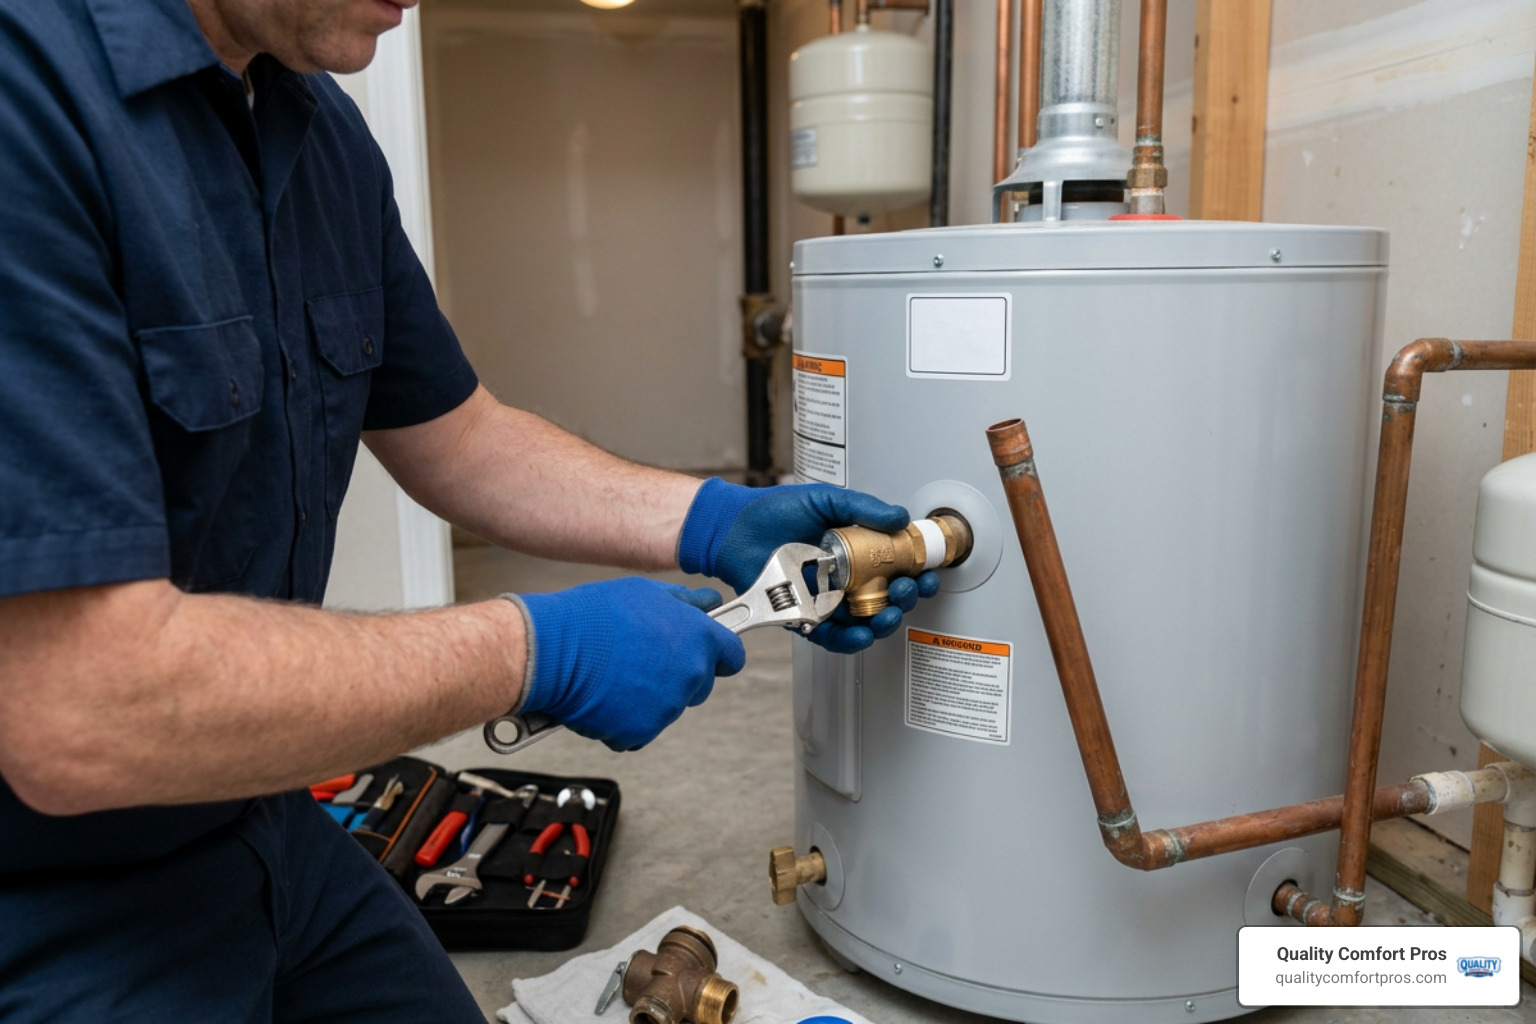
- Remove the Old Valve: Fit your wrench securely around the brass body of the old T&P valve. Turn the wrench counterclockwise to unscrew the valve from the tank. It may take some effort to break the old thread sealant loose.
- Clean the Tank Threads: Inspect the female threads on the water heater tank. Use a rag or a small wire brush to clean away any old pipe dope, Teflon tape, or mineral deposits.
- Prepare the New Valve: Wrap the male threads of your new valve with 4 to 6 wraps of Teflon tape in a clockwise direction. This ensures that as you screw the valve in, the tape will tighten rather than unravel.
- Install the New Valve: Thread the new valve into the tank by hand to avoid cross-threading. Once it is hand-tight, use your wrench to tighten it clockwise until it is snug and the outlet port faces directly downward. Do not overtighten, as this can crack the tank lining.
- Reattach the Discharge Pipe: Screw the discharge pipe back into the outlet of the new valve, applying Teflon tape to those threads as well.
- Refill and Test: Turn the cold water supply valve back on and let the tank fill completely. Keep a hot water faucet open in the house until water flows steadily without sputtering air, then turn the faucet off. Check the new valve connections thoroughly for any signs of dampness or leaks. If everything is dry, turn the power or gas back on.
Troubleshooting and Professional Support
Sometimes, even with a brand-new valve installed, you might still notice water dripping from the discharge pipe. If your new T&P valve continues to leak, it is rarely because the new part is defective. Instead, the valve is usually doing its job and reacting to an underlying system issue.
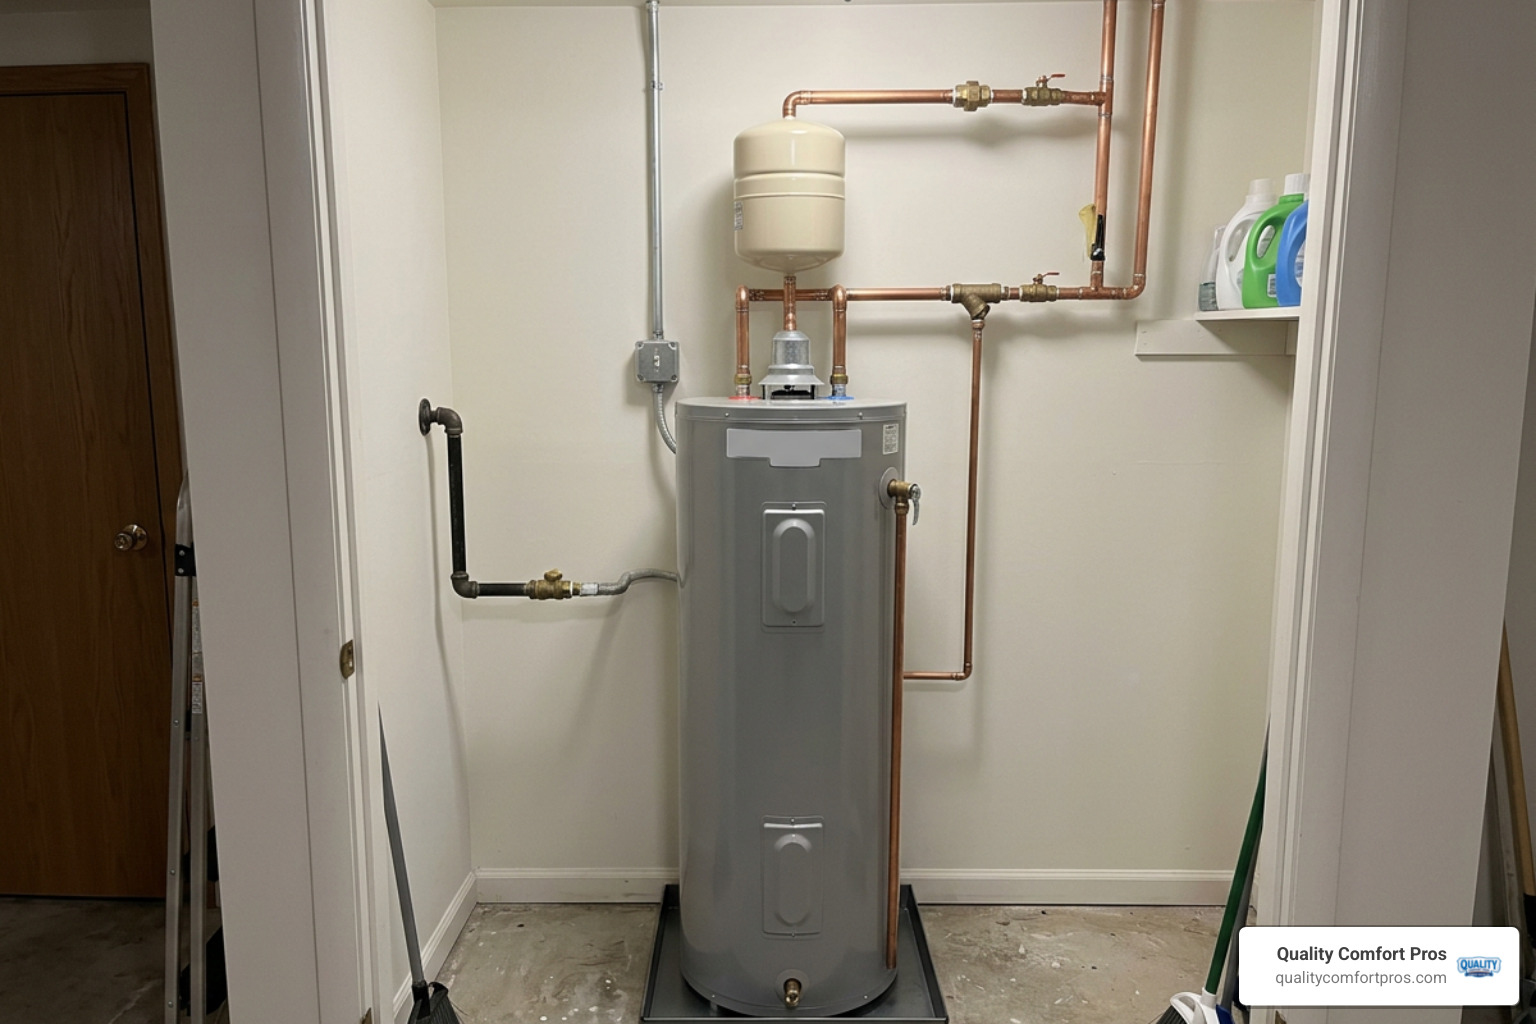
The two most common causes of persistent dripping are:
- High Household Water Pressure: If your home’s incoming municipal water pressure exceeds 80 PSI, it can put constant stress on your water heater. This high pressure, combined with standard thermal expansion, can easily push the T&P valve past its limit.
- Thermal Expansion Issues: In a closed plumbing system, water has nowhere to go when it heats up and expands. If your home has a backflow preventer or pressure-reducing valve without a functional thermal expansion tank, the expanding water will repeatedly force the T&P valve open.
Installing a thermal expansion tank or checking your home’s main water pressure regulator can quickly resolve these issues and protect your entire plumbing system from premature wear.
When to Call a Professional in Gaylord, MI
While replacing a T&P valve is a great DIY project, there are times when it is best to leave the work to experienced professionals. You should call a licensed technician if:
- The old valve is completely rusted in place and will not budge with reasonable wrench pressure.
- You discover that your water heater tank itself is rusted or leaking from the seams.
- You suspect your home has high water pressure but do not have the tools to test or adjust your water pressure regulator.
- Your water heater is an older gas unit with complex venting that makes accessing the valve difficult.
For homeowners in Gaylord, MI, and across Northern Michigan, our team is always ready to help. Whether you need a quick diagnostic check or a complete water heater replacement or repairs, we bring decades of reliable, family-owned expertise to every job.
Frequently Asked Questions About Water Heater Pressure Relief Valves
How often should a water heater pressure relief valve be tested?
We recommend testing your T&P valve at least once a year. Gently lift the metal test lever to let a small amount of water discharge through the pipe, then release it. The valve should snap shut immediately and stop water flow completely. If it continues to drip, it is time for a replacement.
What is the typical lifespan of a T&P valve?
Most plumbing manufacturers recommend replacing the T&P valve every 5 years as preventative maintenance. Even if the valve looks clean on the outside, internal spring fatigue and mineral buildup can compromise its safety function over time.
Is it safe to cap or plug a leaking pressure relief valve?
No, it is extremely dangerous to cap, plug, or block a T&P valve. Doing so removes the water heater’s only safety mechanism for pressure relief. If the system overheats with a capped valve, the pressure can build up until the tank ruptures violently.
How much does it cost to replace a water heater pressure relief valve?
The cost can vary depending on several factors, including whether you choose to do it yourself or hire a professional. Purchasing the valve and thread tape for a DIY project is highly affordable, while professional installation includes the cost of labor, trip fees, and a comprehensive safety inspection of your system.
Why is my new pressure relief valve still dripping?
A new valve that drips is usually reacting to high incoming water pressure (above 80 PSI) or excessive thermal expansion. If your home lacks a thermal expansion tank or has a faulty pressure-reducing valve, the system pressure will naturally rise and trigger the T&P valve.
Can I reuse my old discharge pipe?
Yes, you can reuse your old discharge pipe if it is in good condition, free of corrosion, and fits the outlet of your new valve perfectly. If the pipe is made of thin plastic or shows signs of cracking, it is best to replace it with a new copper or CPVC pipe.
What size pressure relief valve does a standard residential water heater use?
The vast majority of standard residential water heaters use a valve with a 3/4-inch male NPT inlet and a 3/4-inch female NPT outlet. Always verify this size by checking your existing valve’s identification tag before purchasing a replacement.
What happens if a pressure relief valve fails to open?
If a T&P valve fails to open during an over-pressurization or overheating event, the pressure inside the tank will continue to rise. This can lead to a ruptured tank, severe water damage, or, in extreme cases, a violent explosion.
Do tankless water heaters have pressure relief valves?
Yes, tankless water heaters require pressure relief valves to ensure safe operation. Because tankless systems do not store large volumes of hot water, their valve setups are slightly different, but they serve the same critical safety function.
Can high municipal water pressure cause the T&P valve to leak?
Yes, high municipal water pressure is a common cause of mysterious T&P valve leaks. If city water pressure spikes above 80 PSI, it leaves very little room for normal thermal expansion, causing the safety valve to open and drip periodically.
Conclusion
Taking care of your water heater’s pressure relief valve is one of the simplest ways to ensure your home remains safe and dry. Whether you decide to tackle this replacement pressure relief valve water heater project as a DIY weekend task or prefer the peace of mind that comes with professional installation, keeping this safety device in top working order should always be a priority.
At Quality Comfort Pros, we have spent over 28 years helping families across Northern Michigan stay comfortable and safe. From simple valve swaps to complete system upgrades, our family-owned team is proud to offer expert plumbing solutions with all-brand compatibility. If you are in Gaylord, MI, or any of our surrounding communities and need assistance with your system, contact Quality Comfort Pros today to schedule our professional water heater services.