
Why Bath Sink Repair Is Worth Doing Right the First Time
Bath sink repair is one of those home maintenance tasks that is easy to put off, until a small chip turns into a rust stain, or a hairline crack starts letting water seep somewhere it should not.
If you are dealing with a damaged sink right now, here is a quick overview of what you need to know:
Quick Answer: How to Repair a Bathroom Sink
- Identify your sink material (porcelain, enamel, acrylic, fiberglass, ceramic, or composite) as this determines which repair method to use.
- Assess the damage to see if chips and surface cracks are DIY-friendly, or if structural cracks and drain leaks need a professional.
- Choose the right repair kit by using an epoxy putty or chip repair kit for surface damage, or a drain repair kit for drain-related issues.
- Prepare the surface by cleaning thoroughly, letting it dry completely, and lightly sanding the damaged area.
- Apply the repair compound to fill, level, and allow to cure fully before use (typically 24 to 48 hours minimum).
- Maintain the repair by avoiding abrasive cleaners and hard impacts to extend the life of the fix.
Most surface-level sink damage, including chips, small cracks, and minor rust stains, can be handled by a careful DIYer in an afternoon. The key is knowing your sink material, using the right product, and not rushing the curing process.
That said, not every sink problem belongs in the DIY category. Structural cracks, persistent leaks under the basin, or drain assembly failures are situations where calling a licensed plumber is the smarter and safer move. Pricing for professional repairs can vary depending on the type and extent of the damage, but in many cases, repairing is significantly more affordable than full replacement.
This guide walks you through everything, from identifying your sink material to applying a repair compound and knowing when to pick up the phone instead of the epoxy.
I am JD Osman, and through my work at Quality Comfort Pros, I have seen how often a neglected bath sink repair escalates into a costly plumbing call that could have been avoided with the right information early on. Let us make sure that doesn’t happen to you.

Identifying Your Bathroom Sink Material
Before you purchase a bathroom sink repair kit or mix any epoxy, you must know exactly what material your sink is made of. Applying an enamel glaze to an acrylic basin or using an aggressive solvent on a fiberglass surface can ruin your fixture.
To help you figure out what you are working with, we have put together a handy comparison table of the most common bathroom sink materials and their specific repair needs.
| Material | How to Identify | Common Issues | DIY Repair Suitability |
|---|---|---|---|
| Vitreous China / Ceramic | Heavy, cold to the touch, produces a high-pitched ring when tapped gently with a coin. | Hairline cracks, chips from dropped items. | Excellent for surface chips; poor for deep structural cracks. |
| Porcelain-Enameled Cast Iron | Extremely heavy, magnetic, black or gray metal shows through deep chips. | Rusting at chip sites, enamel wear. | High priority (must seal chips quickly to prevent structural rust). |
| Acrylic | Lightweight, warmer to the touch, sounds hollow when tapped. | Scratches, dulling, flexible cracks. | Good; requires flexible acrylic-specific resins. |
| Fiberglass | Lightweight, thin, often integrated into a single countertop unit. | Spiderweb cracks, color fading, punctures. | Moderate; requires fiberglass mesh and resin for holes. |
| Stone Resin / Composite | Matte or semi-gloss finish, very heavy, consistent color throughout the chip. | Scratches, staining, chips. | Good; can be sanded and buffed back to a seamless finish. |
How to Perform the Material Tests at Home
If you are still unsure of what material you have, try these three simple tests:
- The Magnet Test: Hold a kitchen magnet to the underside or side of the sink. If it sticks, you have an enameled cast iron or steel sink. If it does not stick, your sink is ceramic, porcelain, acrylic, or composite.
- The Sound Test: Gently tap the rim of the basin with a coin. A sharp, clear bell-like ring indicates solid porcelain, vitreous china, or ceramic. A dull thud suggests acrylic, fiberglass, or stone composite.
- The Temperature Test: Place your hand flat on an undamaged section of the basin. If it feels instantly cold and takes a moment to warm up, it is ceramic or cast iron. If it feels relatively neutral or warm, it is likely acrylic or fiberglass.
Common Causes of Bathroom Sink Damage
Understanding why your sink damaged in the first place can help you prevent it from happening again. Sinks endure a surprising amount of daily stress.
Thermal Shock
This occurs when a cold sink basin is suddenly exposed to very hot water. The rapid temperature change causes different parts of the material to expand at unequal rates, leading to sudden hairline cracks. This is especially common in older porcelain and ceramic basins during chilly Northern Michigan winters.
Impact Damage
The bathroom cabinet is often filled with heavy glass perfume bottles, ceramic soap dispensers, and metal grooming tools. Dropping any of these items from even a short distance can easily chip brittle porcelain glaze or crack a lightweight plastic basin.
Hard Water and Mineral Buildup
Many homes in Gaylord, MI and the surrounding areas experience hard water. Over time, calcium and magnesium deposits build up around the drain and faucet base. These minerals can etch the protective glaze of your sink, making it porous and highly susceptible to deep staining and cracking.
Rust Stains
If you have an enameled cast iron sink, a simple chip is a ticking clock. Once the protective enamel is breached, moisture reaches the underlying iron. The iron oxidizes, causing rust to spread beneath the remaining enamel, which eventually lifts and cracks the surrounding surface.
High Water Pressure
While high water pressure feels great in the shower, it can wreak havoc on your sink. Excessive pressure puts constant strain on the faucet valves and underlying supply lines. Over time, this stress can cause sudden joint failures, leading to hidden cabinet leaks that rot your vanity and damage the sink structure from below. If you suspect your home has high water pressure, a professional plumbing leak repair service can help locate and resolve the underlying issue.
Choosing the Right Bath Sink Repair Kit
Walk down the plumbing aisle of any home improvement store or browse online, and you will find hundreds of products claiming to fix your sink. Choosing the correct one is the difference between an invisible, permanent fix and an ugly, peeling mess.
Cosmetic Chip Repair Kits vs. Full Drain Repair Kits
A cosmetic chip repair kit is designed strictly for surface-level aesthetics. These kits usually contain a small vial of colored liquid acrylic or epoxy resin, an activator, and miniature spreading tools. They are perfect for filling shallow chips in ceramic, porcelain, or acrylic where there is no structural compromise.
A full drain repair kit, on the other hand, is designed to address functional failures. If water is dripping into your vanity cabinet from the connection point directly beneath the basin, a cosmetic glaze won’t help. You need a kit that includes new rubber gaskets, a replacement drain flange, plumber’s putty, and sometimes a new tailpiece assembly.
Epoxy Putty vs. Epoxy Glue
- Epoxy Putty: This is a two-part clay-like material. You cut off a piece, knead it with your fingers until the inner and outer cores blend into a single color, and press it into the damaged area. It is excellent for deep gouges, rebuilding missing edges, or patching cast iron overlay sinks because it does not sag and can be sanded smooth once cured.
- Epoxy Glue: This is a liquid adhesive, usually dispensed through a dual-syringe nozzle. It is highly liquid and dries crystal clear. Use this if a piece of your solid porcelain sink has broken off cleanly and you need to glue the fragment back in place.
Color-Matching Options
White is not just white. There is alpine white, bone, biscuit, almond, and linen. Most high-quality repair kits come with tinting paste or offer pre-matched colors. If you have an almond or biscuit sink, look for a kit specifically labeled for those shades. For black or dark composite sinks, you can find specialty stone-repair kits that use dark pigments to blend seamlessly with the natural variations of the composite material.
Step-by-Step DIY Bath Sink Repair Process
If you have decided that your sink damage is a good candidate for a DIY fix, follow this detailed, step-by-step process to ensure a clean, durable result.
Preparing the Surface for Bath Sink Repair
The absolute most important step of any surface repair is preparation. If there is any soap scum, oil, moisture, or loose debris left in the chip, the repair compound will fail to bond and will peel away within a few weeks.
- Clean the Area: Wash the damaged area thoroughly with warm water and a mild dish soap. Do not use abrasive sponges that could scratch the surrounding glaze.
- Remove Rust and Loose Material: If you are working on an enameled cast iron sink with visible rust, use a piece of fine-grit sandpaper (around 400-grit) to gently sand away the rust until you see clean metal. Brush away all dust.
- De-grease with Alcohol: Wipe the entire area down with high-concentration isopropyl alcohol. This removes any lingering soap film or body oils.
- Dry Completely: Use a clean, lint-free microfiber cloth to dry the area. For best results, blow a handheld hairdryer over the spot for two minutes to ensure there is absolutely no moisture trapped in the microscopic pores of the material.
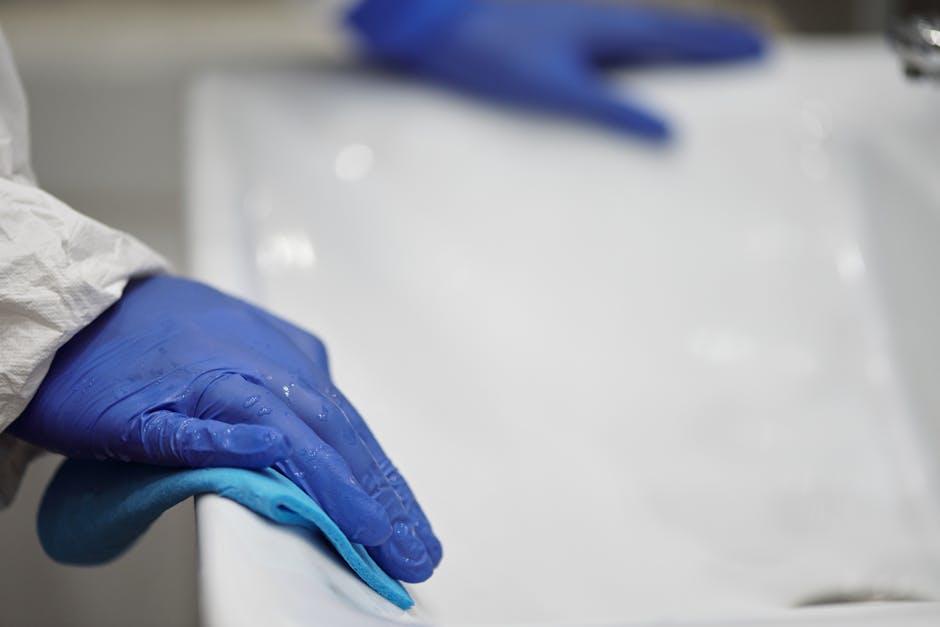
- Safety First: Put on a pair of nitrile gloves and ensure your bathroom is well-ventilated, as epoxy resins can emit strong fumes during application.
Applying the Compound and Finishing the Bath Sink Repair
Once your surface is pristine and bone-dry, you are ready to apply the repair compound.
- Mix the Compound: If using a two-part liquid epoxy, squeeze equal parts onto a disposable piece of cardboard and mix thoroughly with a toothpick for at least 60 seconds. If using a pre-filled patch tube, knead the tube for two minutes before opening to distribute the pigments.
- Apply in Layers: For deep chips, do not try to fill the entire void at once. Apply the compound in thin layers, about 1 millimeter at a time. If using a light-cure acrylic kit, cure each layer with the provided LED light before applying the next.
- Overfill Slightly: On your final layer, apply just enough compound so it sits slightly higher than the surrounding sink surface. This allows you to sand it down perfectly flush.
- Level the Surface: Use the plastic leveling spatula included in your kit to smooth the top of the patch. Wipe away any excess compound from the undamaged surrounding areas immediately using a damp paper towel.
- Let it Cure: Allow the patch to cure undisturbed. Most standard epoxies require 24 to 48 hours to cure completely. Avoid using the sink or letting any water near the repair during this window.
- Sand Flush: Once fully cured, wrap a piece of ultra-fine wet-and-dry sandpaper (2000-grit) around a small sanding block. Wet the paper slightly and gently sand the patch in a circular motion until it feels completely flush with the rest of the sink.
- Buff and Polish: Apply a small dab of automotive polishing compound or the finishing polish included in your kit to a soft cloth. Buff the area vigorously to match the gloss level of the rest of your basin. For a matte finish, a light tap with a dry sponge before curing can help match the texture of stone composite sinks.
When to DIY vs. Calling a Professional Plumber
While patching a minor surface chip is an excellent weekend project, some plumbing problems require professional diagnostic tools and training. Attempting to DIY a complex issue can lead to hidden water damage, mold growth, and expensive structural repairs.
Here is a quick breakdown to help you decide when to handle it yourself and when to call in the experts:
When to DIY:
- Shallow chips smaller than the size of a dime.
- Fine hairline scratches that do not leak water.
- Minor discoloration or surface stains.
- Loose faucet handles or easy-to-reach supply line replacements.
When to Call a Professional:
- Deep Structural Cracks: If a crack runs all the way through the basin or goes from the rim down to the drain, the structural integrity of the sink is compromised. The basin could suddenly shatter under pressure, causing injury or a major flood.
- Under-Sink Cabinet Leaks: Water pooling under your vanity is often a sign of a failing shutoff valve, a cracked drain pipe, or a worn-out P-trap. A licensed plumber can perform a professional plumbing sink repair to stop the water damage before it rots your subfloor.
- Persistent Faucet Drips: If your faucet continues to drip after you have tried tightening the handle, the internal cartridge or valve seat may be worn out. We can assist with reliable plumbing faucet repair to restore your system and save water.
- Full Sink Replacements: If your old sink is simply beyond saving, upgrading to a modern fixture requires careful plumbing integration. Our team offers expert plumbing sink replacement services to ensure your new basin is perfectly sealed, level, and leak-free.
To learn more about identifying and fixing household leaks to save water and protect your home, you can review the guidelines provided by the U.S. Environmental Protection Agency.
Maintenance Tips to Prevent Future Sink Damage
Once your sink is looking beautiful again, a few simple habits can keep it that way for years to come.
Avoid Harsh Chemical Cleaners
Abrasive scrubbing powders, steel wool, and strong bleach can slowly strip away the protective glaze on porcelain and ceramic sinks. Once this glaze is gone, the porous material underneath will stain and chip much more easily. Stick to mild liquid dish soaps or specialty non-abrasive bathroom spray cleaners.
Install a Water Softener
If you live in Northern Michigan, hard water minerals are a constant threat to your plumbing fixtures. Installing a whole-home water softener prevents mineral buildup around your drain and faucet, protecting your sink’s finish and extending the lifespan of your entire plumbing system.
Prevent Impact Damage
Avoid placing heavy, hard items directly on the edge of your sink. Consider swapping out heavy glass soap dispensers for shatterproof plastic or silicone alternatives. If you have a medicine cabinet directly above the sink, be careful when opening it to prevent heavy bottles from tumbling down onto the basin.
Address Small Leaks Immediately
A tiny drip from your faucet or a slow leak under your vanity can quickly escalate. If you notice your faucet handle is loose or difficult to turn, take care of it right away. For step-by-step guidance on handling handle issues, check out our guide on fixing broken sink handles. If you ever run into a plumbing emergency in Northern Michigan, having a reliable professional on hand ensures fast, stress-free resolution before minor issues turn into major water damage.
Frequently Asked Questions About Bath Sink Repair
How do I know if my bathroom sink is porcelain or ceramic?
While both materials look similar, porcelain is a specific, highly durable type of ceramic. Porcelain is fired at much higher temperatures, making it denser, completely non-porous, and more glass-like. If you tap the edge of a porcelain sink gently with a coin, it will produce a clear, high-pitched ringing sound. Standard ceramic sinks will produce a slightly duller sound.
Can you repair a hairline crack in a bathroom sink?
Yes, minor surface hairline cracks can be repaired using a liquid acrylic or epoxy-based sink repair kit. However, if the crack goes all the way through the basin and leaks water underneath, the sink must be replaced for safety reasons, as it can shatter under pressure.
How long does a DIY sink repair kit take to cure?
Cure times vary depending on the product you use. Light-cure acrylic kits can cure in as little as 5 to 10 minutes using a specialized LED light. Standard two-part epoxy kits typically require 24 to 48 hours to cure completely. Always avoid using the sink or exposing the repaired area to water during the curing window.
Are sink repair kits durable enough for daily use?
Yes, high-quality modern epoxy and acrylic repair compounds are designed to be water-resistant, UV-stable, and highly durable. However, they are not as hard as the original fired porcelain glaze. To ensure the repair lasts, avoid using abrasive cleaners, bleach, or dropping heavy objects directly on the patched area.
How do I fix a chipped cast iron enamel sink?
Because cast iron will rust quickly when exposed to moisture, you must act fast. First, sand away any visible rust using fine-grit sandpaper. Clean the area with isopropyl alcohol and dry it completely. Apply a rust-inhibiting primer, then fill the chip with an enamel-safe epoxy putty or touch-up glaze, smoothing it flush with the surrounding surface.
Can I color-match a repair kit for an almond or biscuit sink?
Yes, many manufacturers offer repair kits in popular alternative colors like almond, biscuit, bone, and even black. Some advanced kits also include primary color tinting pastes, allowing you to mix and match the exact shade of your sink on-site.
What is the difference between a cosmetic chip kit and a drain repair kit?
A cosmetic chip kit contains resins and glazes designed to fill and hide surface-level chips, scratches, and gouges. A drain repair kit is a functional kit that includes replacement gaskets, flanges, and plumber’s putty to stop active water leaks occurring at the drain connection beneath the sink basin.
How do I prevent rust from forming under a chipped sink surface?
The key is to seal the chip as soon as it occurs. If you have a metal or cast iron sink, clean the chip immediately, sand away any early signs of oxidation, and apply a waterproof epoxy compound. This blocks oxygen and moisture from reaching the metal, stopping rust in its tracks.
Is it better to repair or replace a cracked bathroom sink?
If the damage is cosmetic, such as minor chips or shallow hairline scratches, repairing is highly cost-effective and can save you up to 75% compared to replacement. However, if the sink has deep structural cracks, persistent leaks, or is more than 15 to 20 years old, replacing the basin is usually the safer and more reliable long-term investment.
When should I call a professional plumber for a sink leak?
You should call a plumber if you notice water pooling inside your vanity cabinet, active leaks from the shutoff valves, a cracked drain pipe, or if you are dealing with a deep structural crack in the basin itself. Professional plumbers have the specialized tools and training to fix the root cause of the leak and prevent structural water damage to your home.
Conclusion
Taking care of a bath sink repair early on is one of the best ways to keep your bathroom looking great and prevent minor cosmetic issues from turning into expensive plumbing repairs. Whether you are dealing with a small chip in your porcelain basin or a tricky leak under the counter, knowing when to tackle the job yourself and when to bring in professional help is key to a successful fix.
If you run into a plumbing issue that is a bit too complex for a DIY kit, or if you are ready to upgrade your bathroom with a brand new sink installation, we are here to help. At Quality Comfort Pros, we have provided reliable, expert, and family-owned plumbing solutions across Gaylord, MI and Northern Michigan for over 28 years. From quick leak fixes to complete plumbing sink repair and replacement services, our experienced team is compatible with all major brands and ready to help keep your home running smoothly. Contact us today!