Why a Broken Kitchen Faucet Deserves Your Attention Right Away
A broken kitchen faucet is one of those household problems that starts small and quietly gets worse over time. What begins as a barely audible drip in the middle of the night can quickly escalate into a major plumbing emergency, complete with warped cabinetry, mold growth, and skyrocketing water bills. Whether you are dealing with a handle that has spun completely loose, a steady drip you cannot seem to silence, or water actively pooling around the base of the spout, the fix is often simpler than you think.
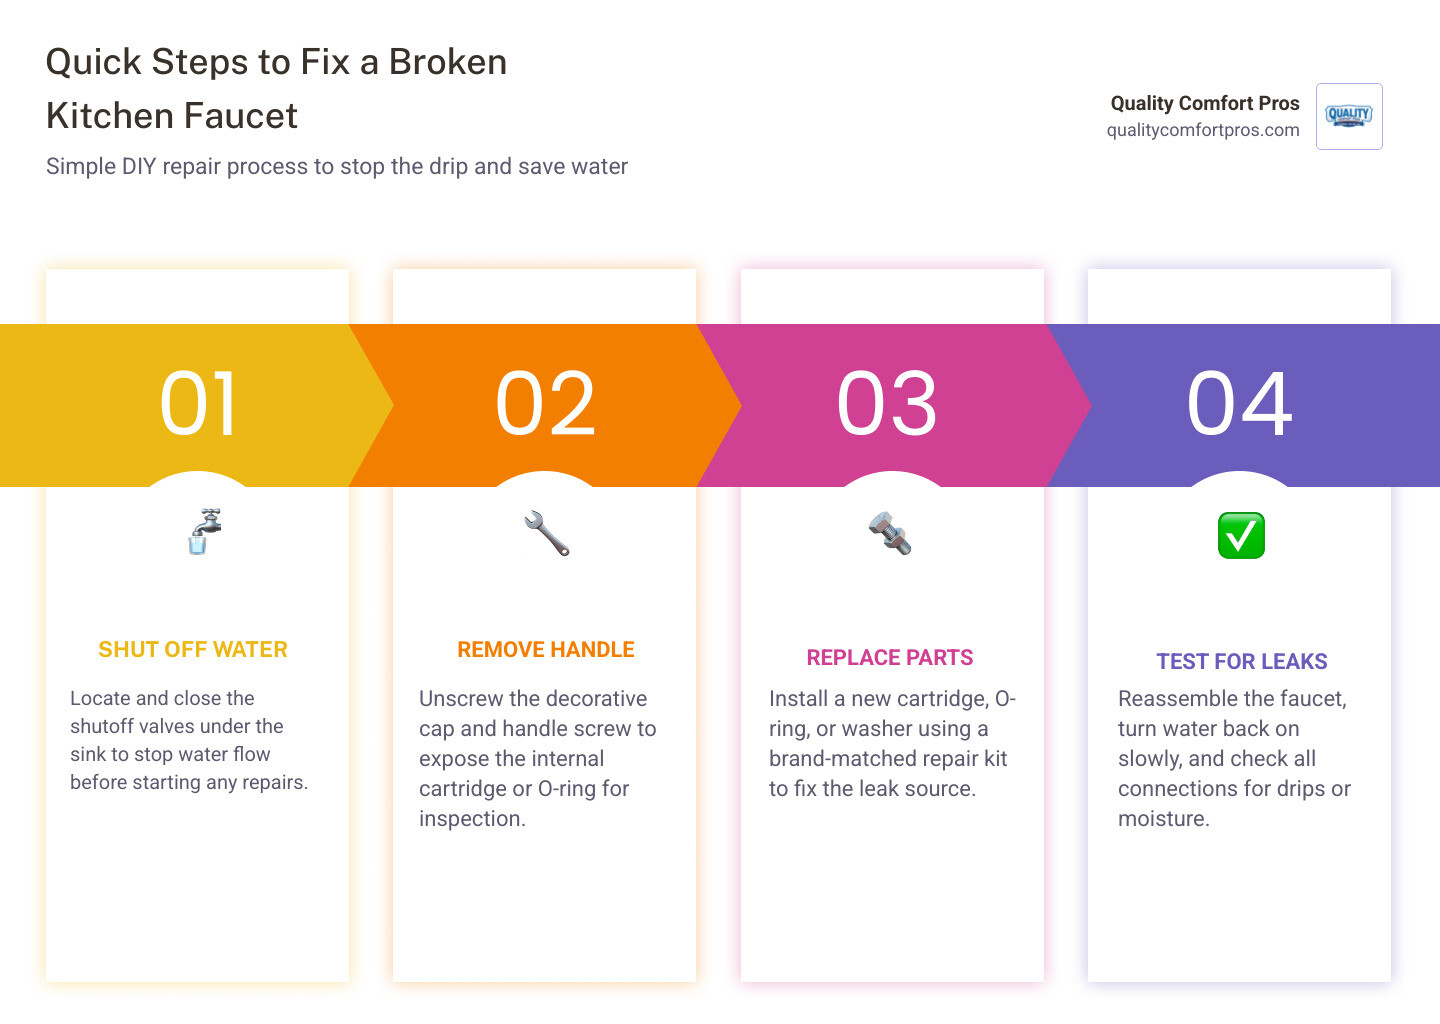
Here is a quick overview of how to fix a broken kitchen faucet:
- Shut off the water supply valves located directly under the sink.
- Plug the drain using a stopper or rag so small parts do not disappear down the pipe.
- Remove the faucet handle by unscrewing the decorative cap and loosening the handle screw.
- Identify the problem part such as a worn cartridge, cracked O-ring, or corroded valve seat.
- Replace the faulty component using a brand-matched repair kit from your local hardware store.
- Reassemble the faucet carefully and turn the water back on slowly to test for leaks.
Most kitchen faucet repairs can be completed in 20 to 30 minutes with basic household tools and inexpensive replacement parts. That said, knowing when to stop and call a professional can save you from a much bigger repair bill down the road.
The stakes of ignoring a leak are surprisingly high. According to the EPA, a dripping faucet can waste up to 3,000 gallons of water per year. That is not just money circling the drain. In areas like Northern Michigan where hard water is incredibly common, that constant drip also accelerates wear on your plumbing fixtures, leaving behind stubborn mineral deposits that are difficult to clean.
The most common culprits behind a broken kitchen faucet are worn washers, loose O-rings, degraded cartridges, and mineral buildup from hard water. Each of these issues has a relatively straightforward fix once you know what type of fixture you are dealing with. This comprehensive guide will walk you through every step of the process, help you identify your specific faucet type, and tell you exactly when it makes more sense to bring in a licensed plumber.
I am JD Osman, and through my work at Quality Comfort Pros, I have seen firsthand how a neglected broken kitchen faucet can escalate from a minor annoyance into a costly plumbing issue for homeowners across Northern Michigan. In this guide, I will share the practical, hands-on knowledge our team uses every day to help you diagnose, repair, or replace your kitchen faucet with complete confidence.
Common Causes of a Broken Kitchen Faucet
To successfully fix a broken kitchen faucet, you first need to understand why it failed in the first place. Faucets are highly active mechanical devices subjected to thousands of usage cycles every single year. Over time, this constant movement, combined with exposure to pressurized water and dissolved minerals, causes internal components to degrade.
Here are the primary reasons why your kitchen faucet might be failing:
- Worn Washers and Gaskets: In older compression-style faucets, rubber washers are used to seal the water flow. Every time you turn the handle, these washers are compressed. Eventually, they flatten, crack, or tear, allowing water to sneak past and create a persistent, annoying drip.
- Loose or Damaged O-Rings: O-rings are small rubber loops designed to prevent water from leaking out of the spout or the base of the handle assembly. If you notice water pooling around the bottom of your faucet whenever you turn it on, a worn-out O-ring is almost certainly the culprit.
- Corroded Valve Seats: The valve seat serves as the connection between the faucet assembly and the spout. Over time, water sediment can accumulate in this area, causing the metal seat to corrode. When this happens, even a brand-new washer cannot create a tight seal, resulting in a continuous leak from the spout.
- Mineral Buildup and Hard Water: This is an exceptionally common issue for homeowners in Gaylord, MI, and surrounding communities like Charlevoix, MI, or Petoskey, MI. Hard water is packed with dissolved minerals like calcium and magnesium. As water evaporates inside the faucet, these minerals leave behind crusty white deposits. This buildup creates friction, makes handles stiff, destroys rubber seals, and can eventually cause plastic components to snap under pressure.
If you are dealing with a steady leak, it is best to consult resources like This Old House guide on repairing leaky faucets to understand the mechanical forces at play. Ignoring these signs can lead to hidden water damage under your sink cabinetry, which can ruin floorboards and promote mold growth. When a simple washer replacement is not enough to stop a major leak, contacting professionals for professional leak repair services is the smartest way to protect your home and preserve your peace of mind.
Repair vs. Replacement: When to Call a Professional
When confronted with a broken kitchen faucet, many homeowners wonder if they should try to patch up the old fixture or start fresh with a brand-new model. While a quick DIY fix is highly satisfying, there are times when replacement is the more practical, cost-effective, and long-lasting route.

Consider these critical factors when deciding whether to repair or replace your faucet:
- Frequency of Repairs: If you have already replaced the cartridge or O-rings multiple times in the last year and the faucet continues to leak, the internal metal body is likely worn down, pitted, or warped. At this point, continuous repairs are just throwing good money after bad.
- Severe Corrosion: If you look under your sink and see heavy rust, green corrosion, or mineral crust covering the mounting hardware and supply lines, the structural integrity of the faucet is compromised. Trying to disassemble a heavily corroded faucet can crack the water lines, leading to an immediate indoor flood.
- Low Water Pressure: If your water pressure remains low even after you clean the aerator, there may be deep mineral blockages or physical damage inside the faucet body itself that cannot be easily cleared.
- Aesthetic and Functional Upgrades: Sometimes, a broken kitchen faucet is the perfect excuse to upgrade. Modern faucets offer touchless operation, pull-down sprayers, and superior water efficiency that can lower your utility bills.
If you decide that your old fixture has reached the end of its lifespan, investing in an expert faucet replacement ensures your new unit is mounted securely, aligned perfectly, and sealed against future leaks.
Step-by-Step Guide to Fixing a Broken Kitchen Faucet Handle
If you have decided to tackle the repair yourself, preparation is key. Taking a systematic approach will prevent common DIY disasters, such as losing small parts down the drain or flooding your kitchen floor.

Preparing to Fix Your Broken Kitchen Faucet
Before you pick up a wrench, you must prepare your workspace to ensure safety and efficiency.
- Locate and Shut Off the Water Valves: Look inside the cabinet beneath your kitchen sink. You should see two valves, one for hot water and one for cold water. Turn these valves clockwise until they stop. If the valves are old and stiff, turn them gently to avoid snapping the stems.
- Relieve Water Pressure: Turn the kitchen faucet handle to the fully open position. This drains any residual water left in the lines and relieves pressure inside the valve body.
- Plug the Sink Drain: Place a rubber stopper or a clean rag over the sink drain. Faucet assemblies contain tiny screws, springs, and clips that love to fall directly down the drain pipe.
- Gather Your Tools: You will need an adjustable wrench, a set of hex keys (Allen wrenches), a flathead screwdriver, a Phillips screwdriver, needle-nose pliers, plumber’s grease, and a bucket or old towel to catch stray drips.
Taking these steps is a core part of preventative plumbing maintenance, ensuring that a minor repair does not turn into a major water damage emergency.
Disassembling and Repairing a Broken Kitchen Faucet
Now that your workspace is prepped and the water is safely off, you can begin the disassembly process.
- Remove the Handle Cap: Most modern single-handle faucets have a small plastic or metal index button (often showing red and blue indicators) hiding the main handle screw. Gently pry this cap off using a flathead screwdriver or the tip of a utility knife.
- Loosen the Handle Screw: Insert the correct size hex key or screwdriver into the exposed hole. Turn the screw counterclockwise to loosen it. You do not always need to remove the screw completely, just loosen it enough so you can pull the handle straight up and off the faucet body.
- Remove the Bonnet Nut: Underneath the handle, you will see a metal decorative collar and a retaining nut (often called a bonnet nut). Use your adjustable wrench to turn this nut counterclockwise. If it is stuck due to mineral buildup, wrap a cloth around the nut to protect the finish and apply steady, even pressure.
- Extract the Old Cartridge or Stem: For cartridge-style faucets, you may need to pull a small brass retaining clip out with needle-nose pliers first. Once the clip is removed, grip the top stem of the cartridge with your pliers and pull it straight upward.
- Inspect and Clean the Valve Body: Look inside the empty faucet body. Use an old toothbrush dipped in white vinegar to scrub away any mineral crust or debris.
- Replace the Cartridge and O-Rings: Take your old cartridge to the local hardware store to ensure you buy an exact match. Coat the rubber seals on the new cartridge with a thin layer of silicone plumber’s grease. Insert the new cartridge into the valve body, aligning any plastic tabs on the cartridge with the notches inside the faucet body.
- Reassemble and Test: Reinstall the retaining clip, thread the bonnet nut back on by hand, and tighten it gently with your wrench. Reattach the handle and tighten the set screw. Turn the water supply valves back on slowly and check for any leaks around the base of the handle.
When to Step Back: Safety and Complexity
While many faucet repairs are straightforward, plumbing systems can be unpredictable. If you encounter seized shutoff valves under the sink, heavily corroded mounting hardware that refuses to budge, or if you lack the specialized tools required for the job, it is highly recommended to stop and contact a professional. Attempting to force corroded parts can lead to broken pipes, major leaks, and severe water damage to your home’s structure.
Understanding Different Faucet Types and Mechanics
Not all faucets are built the same way. The exact steps to fix a broken kitchen faucet depend heavily on the internal mechanism. Modern faucets generally fall into one of four categories: cartridge, ball, ceramic disc, or compression.
- Cartridge Faucets: These are incredibly common in modern homes. They use a plastic or brass cartridge that slides up, down, or rotates to control water flow. They are highly reliable and very easy to repair because you simply swap out the entire cartridge assembly when it fails.
- Ball Faucets: Commonly found in single-handle kitchen sinks, these contain a slotted metal or plastic ball that sits on top of rubber seats and small springs. Because they have many moving parts, they are highly prone to leaking as the rubber seats wear down.
- Ceramic Disc Faucets: These represent the pinnacle of modern faucet technology. Two highly polished ceramic discs slide against each other to control water. They rarely leak, but when they do, it is usually because the rubber seals beneath the cartridge have failed or mineral deposits have scratched the discs.
- Compression Faucets: These are traditional two-handle faucets. They work by turning a screw stem down to compress a rubber washer against a metal seat. They are cheap to build but require frequent washer replacements.
| Faucet Valve Type | Common Failure Points | Repair Difficulty | Lifespan |
|---|---|---|---|
| Cartridge | Internal O-rings, plastic housing cracks | Easy (Full cartridge swap) | Moderate to High |
| Ball | Rubber seats, springs, O-rings | Moderate (Many small parts) | Moderate |
| Ceramic Disc | Bottom seals, mineral scratches | Easy to Moderate | Very High |
| Compression | Rubber washers, corroded valve seats | Easy (Frequent maintenance) | Low to Moderate |
Frequently Asked Questions About Faucet Repair
Why is my kitchen faucet handle loose or spinning?
A loose or spinning handle is usually caused by a loose set screw inside the handle assembly. Over time, the vibrations of turning the water on and off can back the screw out. Simply pry off the decorative cover cap and tighten the hex screw with an Allen wrench. If the handle continues to spin, the plastic splines inside the handle or on top of the cartridge stem may be stripped, requiring a replacement handle or cartridge.
How do I identify my kitchen faucet brand and model?
Look for a laser-etched logo on the faucet body, spout, or escutcheon plate. If you cannot find a logo, look under the sink for a tag attached to the hot or cold water supply lines. This tag often contains the exact model number. You can also take a photo of your faucet and use visual search tools online to identify it.
Can I fix a broken kitchen faucet without turning off the water?
No, you should never attempt to disassemble a faucet without shutting off the water supply first. The water pressure inside your home’s plumbing system is incredibly high. If you remove the cartridge or bonnet nut with the water on, water will shoot out of the valve body with extreme force, causing immediate flooding and potential water damage to your kitchen.
What tools do I need to repair a leaky kitchen faucet?
Most repairs require a basic set of household tools. This includes an adjustable wrench, a set of hex keys (Allen wrenches), flathead and Phillips screwdrivers, needle-nose pliers, an old toothbrush for cleaning mineral deposits, silicone-based plumber’s grease, and a bucket or towel to catch water.
How often should faucet O-rings and cartridges be replaced?
There is no set schedule, but most faucet components last between 5 and 10 years. In areas with highly mineralized hard water, such as Northern Michigan, you may need to replace these components more frequently because mineral deposits accelerate the wear and tear on rubber seals.
Why is my kitchen faucet leaking from the base of the spout?
This type of leak is almost always caused by worn-out O-rings located at the base of the spout assembly. When you swing the spout back and forth, it rubs against these rubber rings. Over time, the friction wears them down. To fix this, you must remove the spout and replace the old O-rings with new ones coated in plumber’s grease.
What causes low water pressure after repairing a faucet?
If you notice low water pressure immediately after a repair, the most likely culprit is loose debris or mineral scale that broke free during disassembly and clogged the aerator. Unscrew the aerator from the tip of the spout, rinse out any trapped sediment, and thread it back on.
Is it cheaper to repair or replace a broken kitchen faucet?
Repairing a faucet is almost always cheaper in terms of initial parts cost, as basic repair kits or cartridges are very affordable. However, if your faucet is old, severely corroded, or has been repaired multiple times, replacing the entire unit is often more cost-effective in the long run because it prevents future leaks and water waste. Pricing can vary depending on several factors, including the brand and style of the fixture you choose.
How does hard water affect kitchen faucet lifespan?
Hard water contains high levels of calcium and magnesium. As water flows through your faucet, these minerals precipitate out and form hard scale deposits. This scale scratches ceramic discs, tears rubber O-rings, clogs aerators, and causes handles to become stiff and hard to turn, significantly shortening the lifespan of the fixture.
When should I stop DIY troubleshooting and call a plumber in Gaylord, MI?
You should stop and call a professional if your under-sink shutoff valves are seized or leaking, if you encounter heavily corroded mounting hardware that will not budge, if you notice active water damage inside your cabinets, or if you feel uncomfortable disassembling the faucet yourself.
Conclusion
A broken kitchen faucet does not have to ruin your week. By understanding the common causes of faucet failures, gathering the right tools, and following a patient, step-by-step approach, you can successfully resolve most minor leaks and loose handles on your own.
However, plumbing systems can be unpredictable. If you run into stubborn, corroded parts, find that your shutoff valves are completely stuck, or simply want the peace of mind that comes with professional installation, we are here to help.
Whether you need fast plumbing repairs, seasonal maintenance, or a complete fixture upgrade, the team at Quality Comfort Pros is ready to provide reliable, expert solutions. Explore our comprehensive plumbing services or schedule your professional faucet repair with our expert technicians today.