Tools, Components, and Pre-Installation Planning
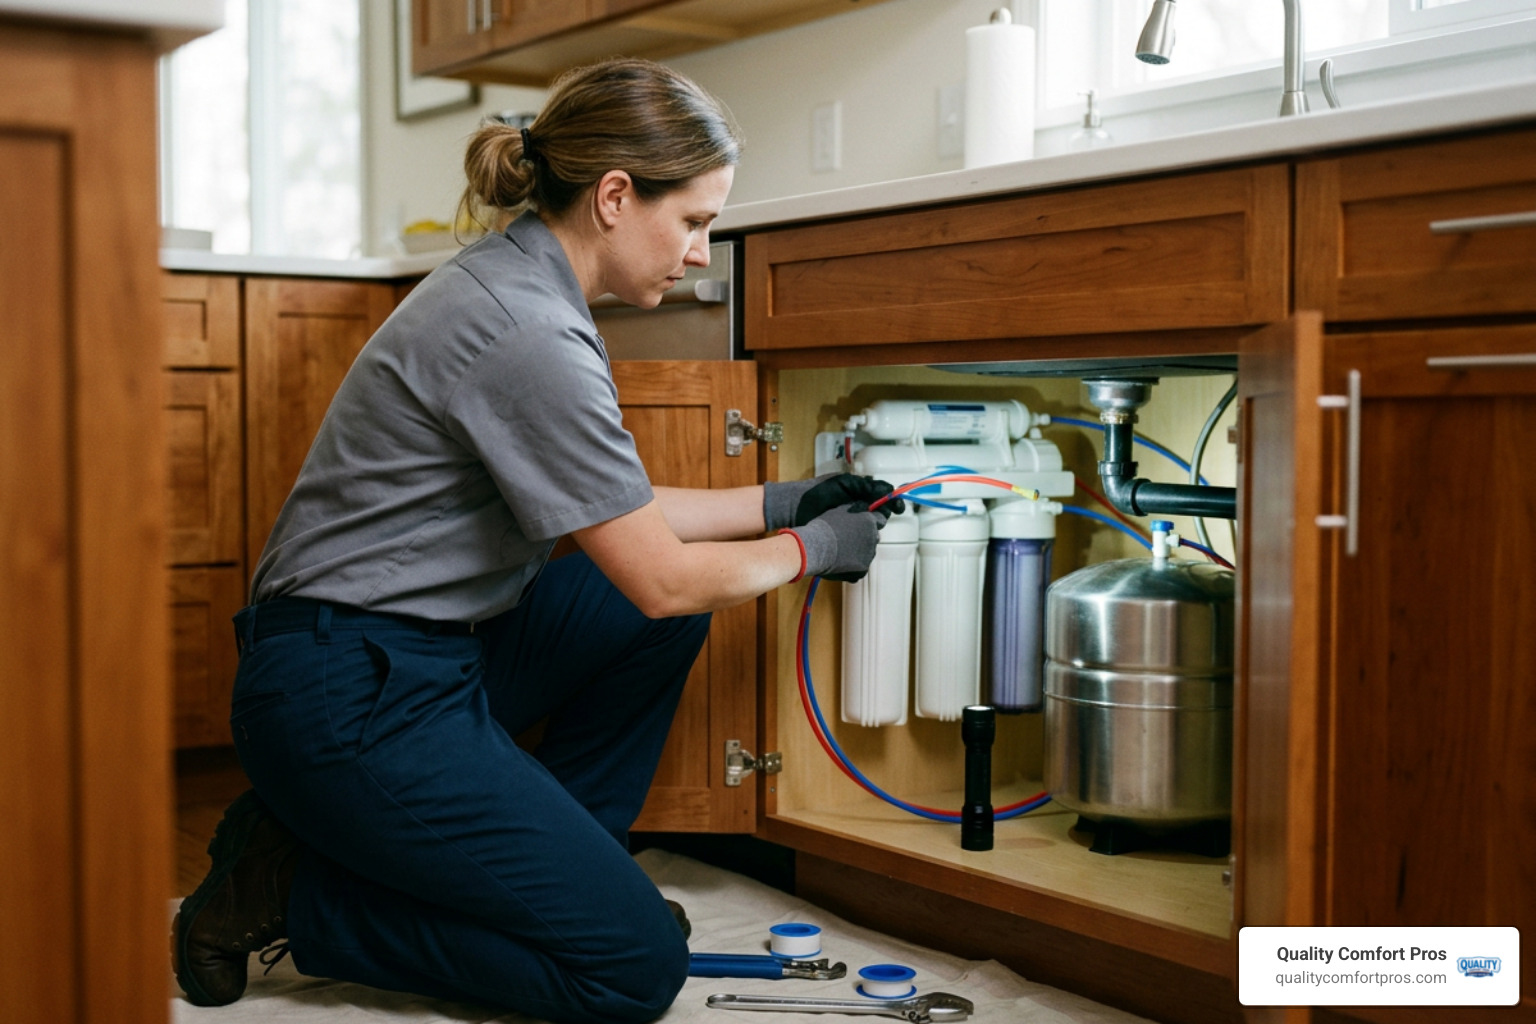
To complete an under-sink reverse osmosis system installation, mount the dedicated dispenser faucet, tap into the cold water supply with a feed adapter, attach the drain saddle clamp above the P-trap, mount the manifold and storage tank, and connect the color-coded tubing lines. Once assembled, sanitize and purge the system thoroughly before drinking the water.
A successful installation begins with careful planning and space management. Before opening any hardware bags, check the area beneath your kitchen sink to ensure you have roughly two-by-two feet of clear space. You need adequate room not only for the filter manifold and the water storage tank, but also for comfortable hand movement when changing filter cartridges later.
Water chemistry and incoming pressure dictate how well a reverse osmosis system performs. Standard residential systems require incoming cold water pressure between 40 and 100 PSI (pounds per square inch). If your home relies on a private well with low pressure switch settings, or if municipal delivery pressure stays below 40 PSI, the system may run continuously to the drain or produce very little purified water. In these situations, adding an electric booster pump helps achieve peak performance.
Water composition also plays a huge role in membrane longevity. Hard water with calcium and magnesium levels above 10 grains per gallon (gpg), or water containing dissolved iron and manganese, can quickly foul and plug a delicate thin-film composite membrane. Before setting up your system, running a professional water quality test provides an accurate breakdown of your mineral levels, allowing you to install a water softener or dedicated pre-filter if needed.
Essential Tools and System Hardware Checklist
Gathering the proper tools beforehand prevents sudden trips to the local hardware store with your main water line shut off. Here is what you will need:
- Variable-speed drill with a 1/2-inch or 1-1/4-inch hole saw (matching your faucet stem) and a 7/32-inch high-speed drill bit
- Dedicated plastic tubing cutter or a sharp utility knife (to ensure square, burr-free cuts)
- Adjustable wrench and open-ended basin wrench
- Phillips and flathead screwdrivers
- Roll of PTFE thread seal tape (plumber’s tape)
- Food-grade silicone lubricant (for O-rings)
- Low-pressure tire gauge (0 to 20 PSI range) and a bicycle hand pump
- Clean bucket, towels, and safety glasses
Most multi-stage drinking water packages supply the core hardware components, including the feed water angle stop adapter, a drain saddle clamp assembly, the pre-pressurized bladder storage tank with shut-off valve, a dedicated dispenser faucet, color-coded 1/4-inch and 3/8-inch polyethylene tubing, and quick-connect push fittings.
Site Preparation and Pre-Checks for RO Water Filter Installation
Once your tools are laid out, turn your attention to the storage tank. Traditional reverse osmosis tanks contain an internal rubber bladder surrounded by pressurized air. When completely empty, the baseline air pre-charge pressure should sit between 5 and 7 PSI (or up to 10 PSI depending on manufacturer specifications).
Locate the Schrader air valve (which looks just like a car tire valve) on the side or lower base of the tank. Remove the protective cap and test the pressure using your low-range tire gauge. If the pressure reads below 5 PSI, use a standard bicycle hand pump to add air slowly. Do not use high-pressure air compressors, as they can easily rupture the internal bladder.
Next, plan the exact placement of your components. The filter manifold should be mounted on a cabinet sidewall or rear wall, elevated at least 2 inches above the cabinet floor so you can unscrew the filter sumps easily during routine servicing. Ensure the heavy storage tank sits flat on the cabinet base or on reinforced shelving, because a full 3-to-4-gallon tank can weigh close to 30 pounds.
Complete Guide to RO Water Filter Installation in 5 Steps
Now that site preparation is complete, you can begin the mechanical assembly. Take your time with each stage, paying close attention to clean cuts and secure fittings.
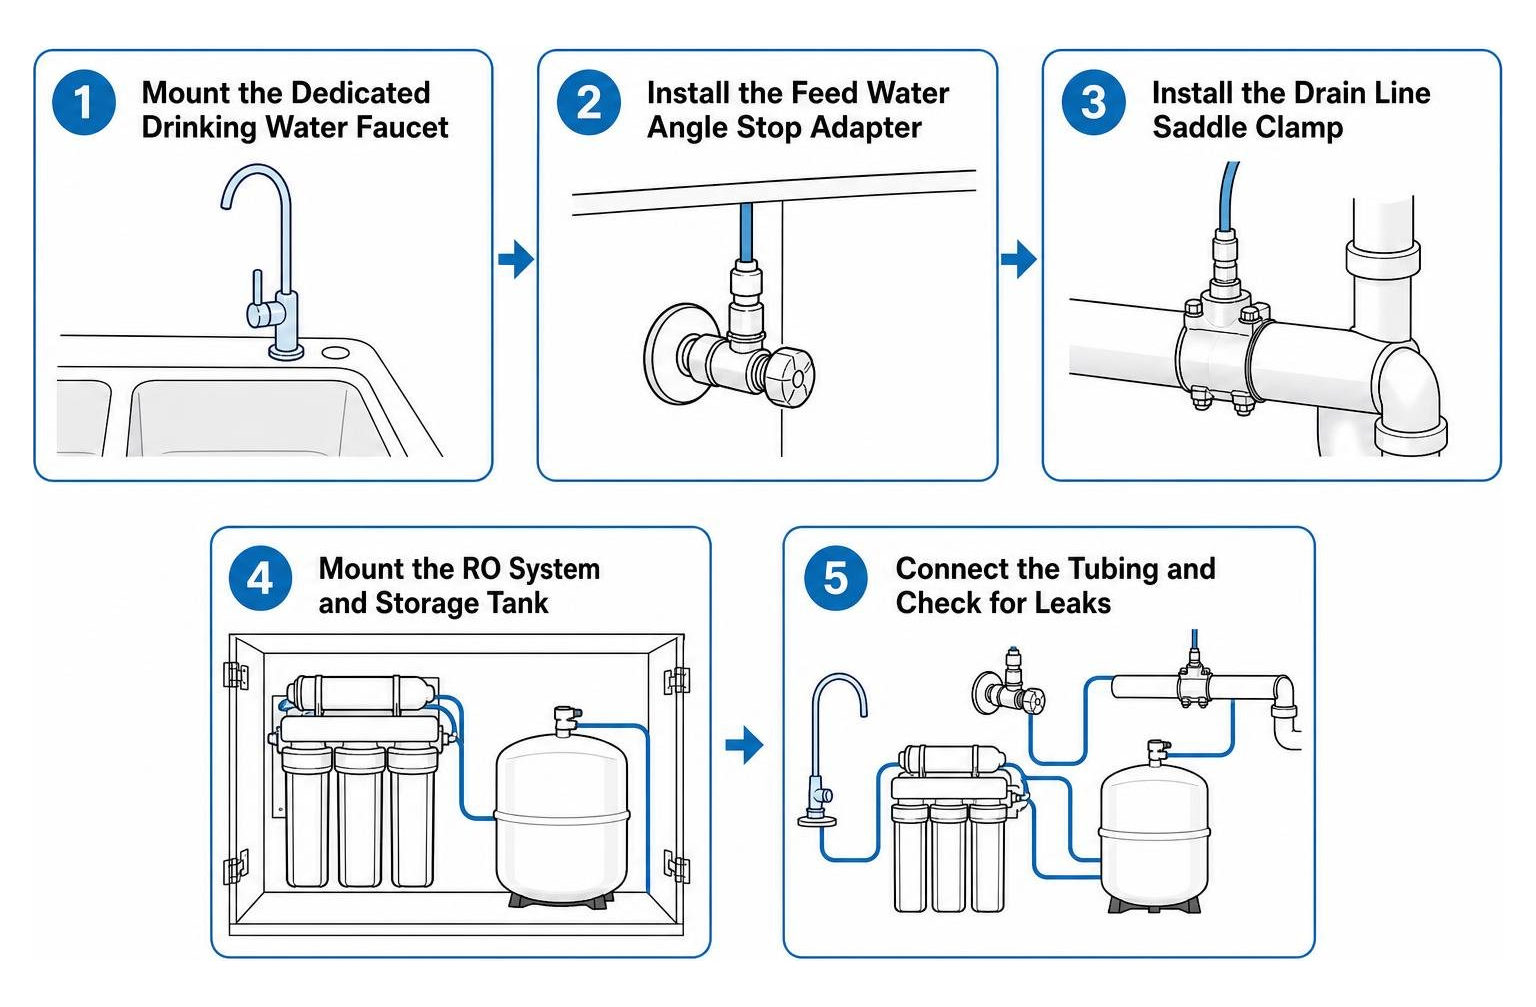
Step 1: Mount the Dedicated Drinking Water Faucet
Most residential reverse osmosis units use a dedicated secondary faucet installed directly on the sink deck or countertop. If your sink already features an unused accessory hole (such as an old vegetable sprayer port or soap dispenser), you can repurpose it immediately. If not, you will need to drill a new opening.
For stainless steel sinks:
- Apply a layer of masking tape over the chosen mounting spot near the corner of the sink basin to prevent the drill bit from wandering.
- Center punch the location lightly.
- Drill a small pilot hole using a 1/4-inch high-speed bit at roughly 2,500 RPM.
- Enlarge the opening using an appropriately sized hole saw (usually 1/2-inch for non-air-gap faucets or 1-1/4-inch for air-gap models). Deburr any sharp metal edges with a small round file.
For porcelain, cast iron, or solid stone countertops, extreme care is required to prevent cracking or chipping. When drilling through porcelain-enameled steel, use a specialized carbide cutter and build a shallow ring of plumber’s putty around the spot. Fill the ring with cool water to lubricate the bit and keep heat down. For natural stone such as granite or quartz, always use a diamond core bit with continuous water cooling, or hire a professional stone fabricator to avoid costly countertop fractures.
Once the hole is ready:
- Slide the chrome escutcheon plate and rubber washer over the faucet threaded stem above the counter.
- Lower the stem down through the drilled opening.
- From underneath the cabinet, slide the slotted plastic washer and star locknut over the stem.
- Hand-tighten the nut, align the faucet spout facing the sink bowl, and firmly tighten the locknut with an adjustable or basin wrench.
Step 2: Install the Cold Water Feed Supply Adapter
Your reverse osmosis unit must connect exclusively to the cold water supply line. Connecting an RO system to a hot water pipe will permanently damage the microscopic pores of the thin-film composite membrane and void your equipment warranty.
- Locate the cold water shut-off valve under your sink (the valve on the right side) and turn it fully clockwise until closed.
- Open the main kitchen sink faucet handle to relieve residual water pressure and drain standing water into the sink.
- Disconnect the existing flexible faucet riser tube from the angle stop valve using an adjustable wrench. Keep a small pan or towel beneath the fitting to catch any remaining drips.
- Wrap 3 to 4 turns of PTFE thread seal tape clockwise around the male threads of your feed water adapter valve.
- Thread the adapter directly onto the angle stop outlet and tighten firmly with your wrench, taking care not to over-tighten and deform the internal rubber gasket.
- Reconnect your kitchen faucet’s flexible supply line to the top branch of the adapter.
- Insert the 1/4-inch feed tubing into the push-fit or compression side port of the adapter valve, ensuring the small inline shut-off valve remains closed for now.
Step 3: Mount the Wastewater Drain Saddle Clamp
All reverse osmosis purification processes generate reject water (also called brine) that carries rejected minerals and contaminants away from the membrane. The drain saddle clamp provides a clean, sealed path for this wastewater to enter the household drainage system.
- Identify a clear section on the sink drain tailpiece. The clamp must always be installed above the P-trap on a vertical pipe section, and well away from the discharge line of a garbage disposal to prevent food waste from entering the RO line.
- Position the front half of the drain saddle clamp on the pipe, and use a pencil to mark the center opening.
- Remove the clamp and drill a clean 7/32-inch hole through the front wall of the plastic drainpipe only. Be careful not to plunge the drill bit completely through both sides of the pipe.
- Align the drain saddle hole with your drilled opening. You can slip a small drill bit or screwdriver through the clamp fitting and into the pipe hole to hold perfect alignment while tightening the clamp bolts evenly.
- Tighten the clamping nuts securely with a screwdriver so the foam gasket compresses against the pipe without crushing the plastic tailpiece.
- Route the drain tubing from the RO manifold or faucet air gap down to the push-fit fitting on the drain saddle. Keep this line as straight and direct as possible, with a steady downward slope and zero dips, loops, or sagging bends that could create backpressure.
Step 4: Position the Storage Tank and Mount the RO Manifold
With the faucet, feed line, and drain connection established, you can now set the primary purification components in place.
- Take the empty bladder storage tank and wrap 4 to 5 turns of Teflon tape clockwise around the stainless steel male threads at the top nipple.
- Thread the plastic tank shut-off ball valve onto the nipple by hand until it seats snugly against the rubber washer. Add an extra half-turn with an adjustable wrench if needed, but do not over-torque, as plastic valve bodies can crack.
- Place the storage tank inside the cabinet, keeping it close to the manifold location to minimize tubing lengths.
- Hold the main RO bracket assembly against the chosen cabinet sidewall. Ensure there is at least 2 inches of open clearance between the bottom of the filter housings and the cabinet floor.
- Mark the mounting screw holes on the cabinet wall, drive two pan-head wood screws into place (leaving the heads protruding roughly 1/8 inch), and hang the manifold bracket securely onto the screws.
Step 5: Connect the Plumbing Lines for RO Water Filter Installation
Modern systems use color-coded polyethylene tubing paired with quick-connect push-in fittings for fast, leak-free assembly. Understanding how these fittings work makes the final hookup simple:

To make a proper connection:
- Cut each tube end squarely using a dedicated tubing cutter. Angled or jagged cuts will damage the internal O-ring and cause leaks.
- Mark the end of the tube with a pencil roughly 5/8-inch from the tip.
- Push the tube firmly into the fitting until you feel it pass through the internal collet and seat past the rubber O-ring. The pencil mark should now be nearly flush with the collet face.
- Pull back gently on the tube to confirm the internal stainless steel teeth have locked onto the tubing wall.
- Slide a colored locking clip behind the collet collar to prevent accidental release.
Follow your specific system layout to complete the connections:
- Feed Water Line (often white or blue): Connect from the angle stop feed adapter to the Stage 1 sediment pre-filter inlet.
- Waste Drain Line (often black or red): Connect from the membrane housing drain port (downstream of the internal flow restrictor) to the drain saddle clamp above the P-trap.
- Storage Tank Line (often yellow): Connect from the post-filter tee fitting directly to the storage tank top ball valve.
- Pure Water Delivery Line (often blue): Connect from the final polishing carbon filter outlet up to the dedicated dispenser faucet stem.
If you wish to route clean water to your refrigerator’s automatic ice maker and door dispenser, insert a 1/4-inch push-fit tee with a dedicated ball valve into the pure water line leading to the faucet. Keep refrigerator lines under 10 feet to maintain strong delivery pressure, and always use plastic polyethylene tubing rather than copper piping, as mineral-free RO water can slowly corrode copper over time.
System Sanitization, Initial Startup, and Purging Procedures
Before pouring your first glass of water, the newly assembled filtration system must be chemically sanitized and thoroughly flushed to remove manufacturing residues, loose carbon fines, and biological impurities.
Step-by-Step Chemical Sanitization Protocol
Sanitizing the system ensures that every internal chamber, tubing run, and storage bladder is completely sterile before regular use.
- Ensure the main cold-water supply adapter is closed and the storage tank valve is turned to the closed position.
- Unscrew the Stage 1 sediment, Stage 2 carbon, and Stage 3 carbon filter sumps using your housing wrench.
- Remove the wrapped carbon and sediment filter cartridges and set them aside in a clean area. Leave the reverse osmosis membrane inside its protective wrapper for now.
- Pour approximately 2 to 3 milliliters (about half a teaspoon) of standard, unscented 5.25% household liquid bleach directly into the empty Stage 1 filter housing sump.
- Screw all empty filter housing sumps back onto the manifold bracket, making sure the rubber O-rings sit squarely in their grooves. Hand-tighten until snug.
- Slowly open the cold water supply valve to allow pressurized water to fill the empty housings and travel through the manifold.
- Open the tank valve and the dedicated sink faucet until water begins flowing from the spout, then turn off the sink faucet.
- Allow the sanitizing water solution to fill the storage tank and dwell within the system lines for 15 to 30 minutes.
- Open the sink faucet fully to drain the bleach solution from the holding tank and lines completely.
- Shut off the water feed, relieve system pressure through the open faucet, and carefully unpack and install your pre-filter cartridges and thin-film composite membrane into their designated housings. Apply a thin film of food-grade silicone grease to all rubber O-rings during reassembly to ensure a watertight seal.
System Commissioning and Startup Flushing
With your filters and membrane securely seated, it is time to pressurize the system and flush out initial loose carbon particles.

- Turn on the cold water supply feed valve slowly. Keep the dedicated drinking water faucet open.
- Water will begin to drip slowly from the faucet spout after several minutes. Let the faucet drip continuously for 15 to 30 minutes to purge air pockets and loose carbon fines from the post-filters. The initial water may appear grayish or blackish due to harmless carbon dust; this is completely normal.
- Close the sink dispenser faucet and open the valve on top of the storage tank.
- Allow the system to run undisturbed for 2 to 4 hours while the storage tank fills to maximum capacity. During this period, inspect every fitting, valve thread, and housing seam under the sink using a dry paper towel to catch any tiny leaks or weeping connections.
- Once the tank is full and the automatic shut-off valve stops reject water flow to the drain, open the dispenser faucet completely and drain the entire tank of water into the sink until flow slows to a trickle.
- Repeat this fill-and-drain process two to three full times. Discarding the first 2 to 3 tanks ensures that all traces of sanitizing bleach and fine particles are eliminated, leaving you with crisp, clean drinking water.
If you notice that your newly filtered water looks slightly cloudy during the first few days of operation, do not worry. This harmless cloudiness is caused by microscopic air bubbles trapped in the dense filter media and will clear up naturally as the system stabilizes.
Routine Maintenance and Filter Replacement Schedule
Reverse osmosis systems are remarkably durable, but they rely on timely filter changes to prevent membrane fouling and maintain safe drinking water standards set by organizations like the U.S. Environmental Protection Agency (EPA) for household water treatment.
Cartridge and Membrane Replacement Cycles
Neglecting your pre-filters allows sediment and chlorine to reach the thin-film composite membrane. Chlorine is especially harmful to reverse osmosis membranes, stripping their microscopic filtration layers in a matter of weeks.
| Component Stage | Function & Purpose | Recommended Replacement Frequency |
|---|---|---|
| Stage 1: Sediment Pre-Filter | Captures dirt, sand, rust, and pipe scale | Every 6 to 12 Months |
| Stage 2 & 3: Carbon Block Pre-Filters | Adsorbs chlorine, chloramines, tastes, and VOCs | Every 6 Months (3 Months on high-chlorine lines) |
| Stage 4: RO Semipermeable Membrane | Eliminates dissolved solids, heavy metals, and PFAS | Every 2 to 4 Years (depending on water hardness) |
| Stage 5: Post-Carbon Polishing Filter | Removes lingering odors from storage bladder | Every 12 Months |
| Stage 6: Alkaline Remineralization | Restores beneficial calcium and balances pH | Every 12 Months |
Whenever you are ready for routine service, you can learn more about proper cartridge swaps in our detailed guide on RO water filter replacement. Staying on top of scheduled RO water filter maintenance extends the life of your equipment and protects your home from water damage caused by worn seals or cracked housings. As a rule of thumb, replace clear plastic sumps every 5 years and opaque plastic housings every 10 years to prevent structural fatigue.
Performance Testing and TDS Rejection Verification
The most accurate way to verify that your membrane is operating correctly is by using a digital Total Dissolved Solids (TDS) meter. A TDS meter measures electrical conductivity to calculate the parts per million (ppm) of dissolved minerals and salts in your water.
To check your system’s performance, use the standard Rejection Rate formula:
$$\text{Rejection Rate (\%)} = \frac{\text{Feed Water TDS} – \text{RO Product Water TDS}}{\text{Feed Water TDS}} \times 100$$
For example, if your incoming tap water tests at 300 ppm TDS and your purified RO water tests at 15 ppm TDS:
$$\text{Rejection Rate} = \frac{300 – 15}{300} \times 100 = \frac{285}{300} \times 100 = 95\%$$
A healthy, functioning reverse osmosis membrane will deliver a rejection rate between 90% and 99%. If your test results show a rejection rate falling below 80% to 85%, your membrane is likely exhausted or damaged and requires replacement. If your system experiences persistent low pressure, unusual noises, or continuous draining, reviewing our diagnostic steps for RO water filter repair will help you isolate the issue quickly.
Frequently Asked Questions About RO Water Filter Installation
How long does a standard RO water filter installation take?
A standard under-sink installation generally takes between 1 and 2 hours for a homeowner with basic DIY plumbing experience. If you need to drill through thick stone countertops or route specialized lines through a finished basement to a refrigerator ice maker, the installation may take 3 hours or more.
Can I install an under-sink reverse osmosis system myself?
Yes, most residential systems are designed for DIY-friendly installation using color-coded tubing and push-fit connections. However, you must feel comfortable shutting off water supply valves, drilling into sink tailpieces, and working in tight spaces. If your home has complex plumbing, unsoftened well water, or delicate stone countertops, calling a licensed professional plumber is the safest route.
What should the air pressure be in an empty RO storage tank?
An empty reverse osmosis bladder storage tank should have a pre-charge pressure of 5 to 7 PSI (and up to 10 PSI on certain large-capacity models). Always check and adjust this pressure using a standard bicycle hand pump and low-pressure gauge when the tank is completely disconnected and drained of water.
Where should the drain saddle valve be positioned on the sink drain pipe?
The drain saddle clamp must always be installed on a vertical or horizontal drain pipe section upstream and above the P-trap. It should be positioned well away from and above garbage disposal discharge lines to prevent food particles and wastewater from clogging the RO brine tube.
Why must the feed water adapter only connect to the cold water line?
Reverse osmosis membranes are constructed from thin-film composite polymers that degrade rapidly when exposed to hot water. Connecting the system to a hot water line will melt or warp the membrane pores, ruining the filter and voiding the manufacturer warranty.
How do I drill a hole for an RO faucet in granite or porcelain sinks?
For porcelain-enameled sinks, use a specialized carbide-tipped hole saw with a water lubrication dam made of plumber’s putty to prevent thermal cracking. For solid granite or quartz countertops, always use a diamond-grit hole saw at low speeds with continuous water lubrication, or hire a countertop specialist.
Why is my reverse osmosis water cloudy or dark gray after initial installation?
Cloudy white water is caused by millions of harmless micro-air bubbles trapped within the new filter media, which typically clear within 3 to 5 days. Grayish or black water during initial startup is caused by loose carbon dust being purged from new post-filters and will disappear completely after flushing the first 2 to 3 tanks.
Can an under-sink RO system be connected to a refrigerator ice maker?
Yes, by adding a 1/4-inch push-fit tee fitting and inline shut-off valve to the purified water delivery line. Make sure the tubing run remains under 10 feet to maintain good pressure, and avoid using copper pipes because pure reverse osmosis water can leach copper ions into your drinking supply over time.
What feed water pressure is required for reverse osmosis systems to work properly?
Residential reverse osmosis systems require an operating cold water pressure between 40 and 100 PSI, with 60 to 80 PSI representing the ideal performance range. If your water pressure rests below 40 PSI, installing an electric booster pump is necessary to ensure proper membrane separation and prevent excessive wastewater generation.
How many tanks of water should I discard before drinking from a new RO unit?
You should always completely fill and discard the first 2 to 3 full storage tanks of water. This purge cycle thoroughly flushes out sanitizing bleach, manufacturing residues, and initial carbon fines, ensuring your water is pure, safe, and clean-tasting.
Enjoy Crisp, Clean Drinking Water in Your Home
A properly installed reverse osmosis drinking water system provides unmatched peace of mind, eliminating heavy metals, dissolved solids, microplastics, and lingering chemical tastes directly at your kitchen tap. By carefully following the step-by-step guidelines in this guide, maintaining secure quick-connect fittings, and keeping up with routine filter flushes, you can enjoy pristine drinking water for years to come.

If you live in Gaylord, MI or throughout Northern Michigan, including communities like Petoskey, MI, Boyne City, MI, East Jordan, MI, Charlevoix, MI, Grayling, MI, and surrounding areas, local water conditions such as seasonal temperature drops and high well mineral content can present unique plumbing challenges. If you prefer to have your water tested or want an expert installation completed without the DIY hassle, Quality Comfort Pros is here to help.
Our family-owned team brings 28 years of trusted experience to home plumbing, heating, and cooling services. Whether you need a comprehensive water quality evaluation or professional RO water filter installation backed by all-brand compatibility, contact Quality Comfort Pros today to schedule your home water consultation.